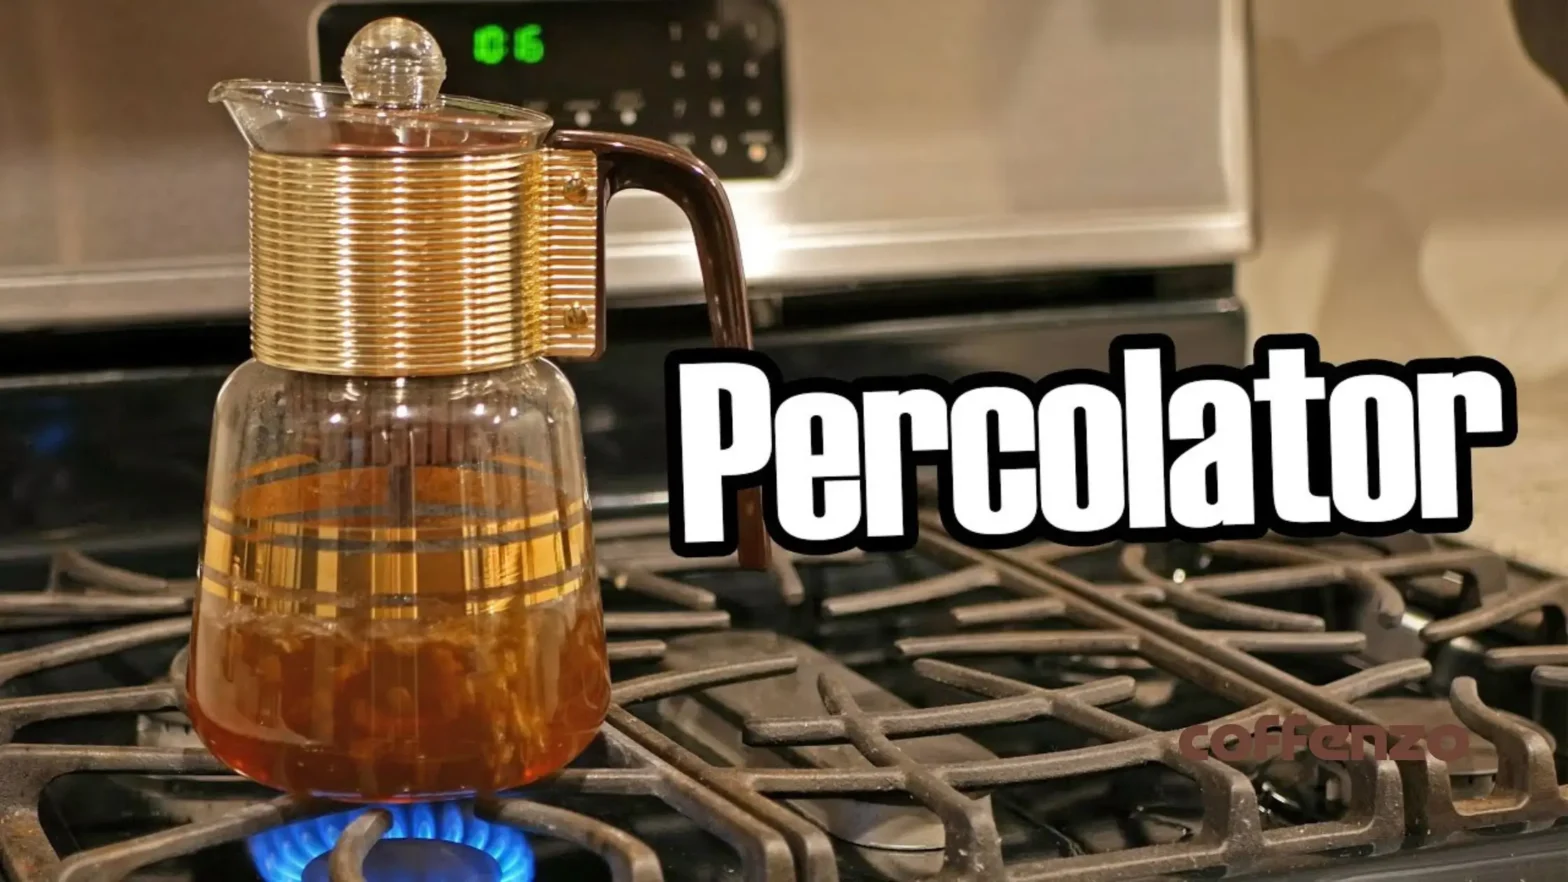
You can brew coffee in many ways, but few methods carry the timeless charm of a percolator. Whether you are a seasoned home barista or just beginning to explore the world of specialty brewing, understanding how a coffee percolator works can deepen your appreciation for this classic machine — and help you brew a better cup. So, how does a percolator coffee pot work?
A percolator coffee pot works by repeatedly cycling boiling water upward through a vertical tube and over a basket of ground coffee. As the hot water passes through the grounds, it extracts flavor and drips back into the lower chamber — a cycle that continues until the desired strength is reached.
Before we dive into the mechanics, let’s start with the basics.
What is a Coffee Percolator?
A coffee percolator is a type of pot designed to brew coffee by continuously cycling near-boiling water through coffee grounds using gravity and steam pressure.
Unlike modern drip coffee makers, percolators rely on a simple, self-contained mechanism that requires no paper filters and no electricity in their stovetop form.
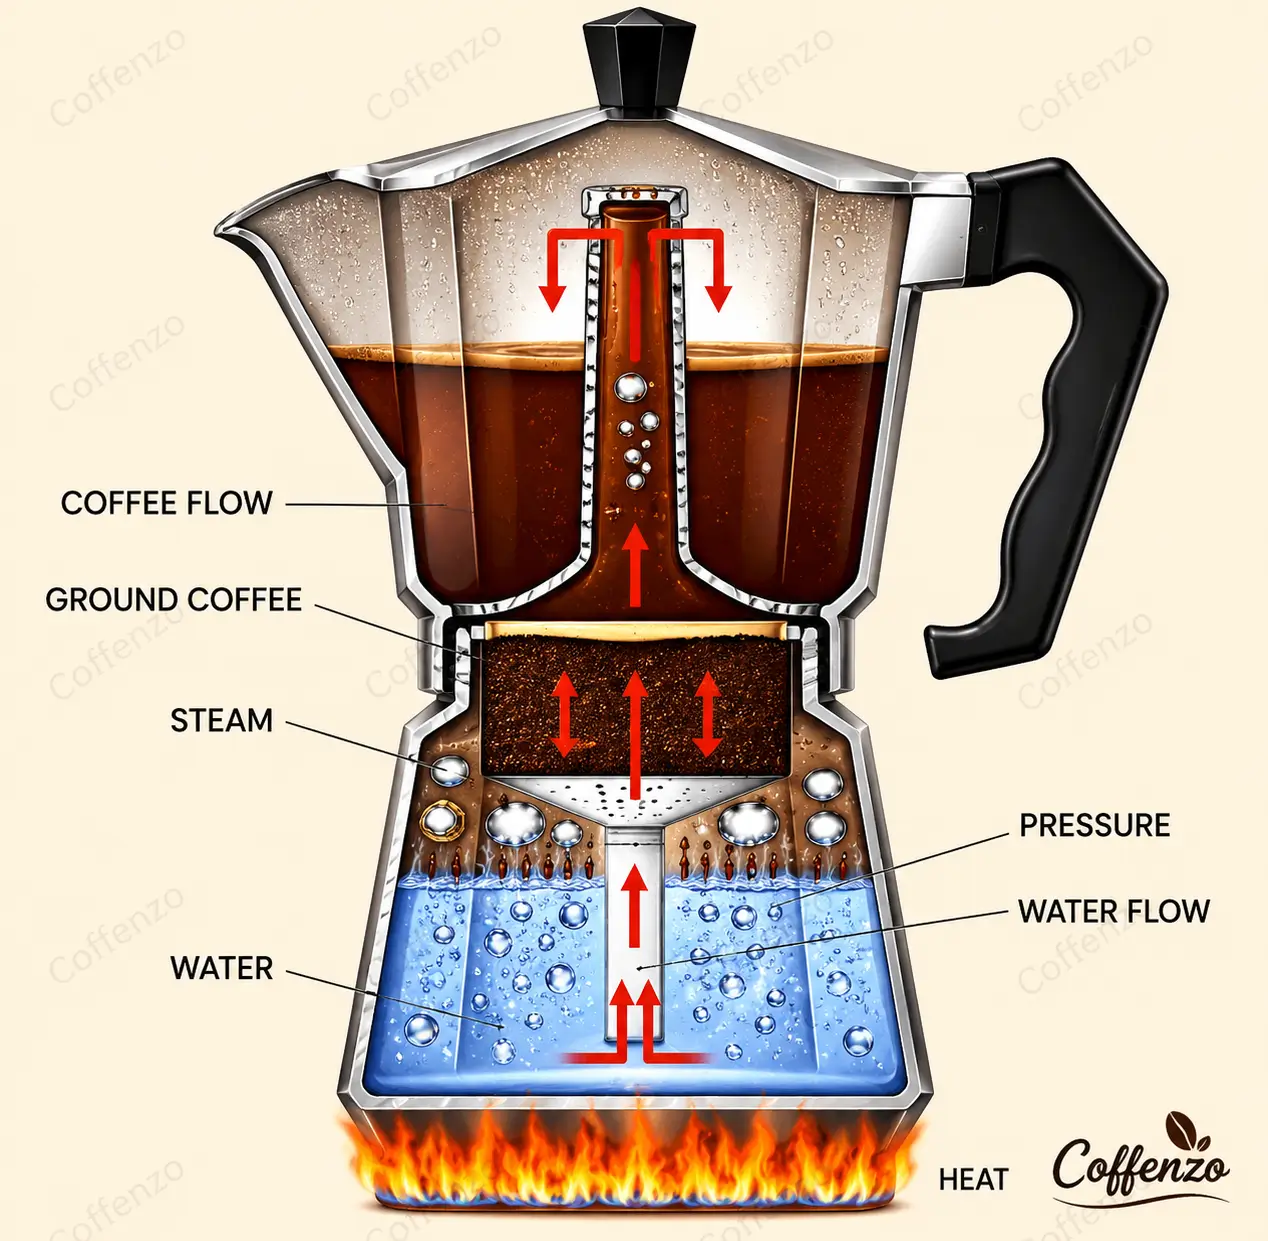
A standard percolator consists of three key components:
- A lower water chamber, where cold water is added before brewing.
- A vertical tube (or standpipe), which carries hot water up from the bottom chamber to the top.
- A brew basket, which sits at the top of the tube and holds the coffee grounds.
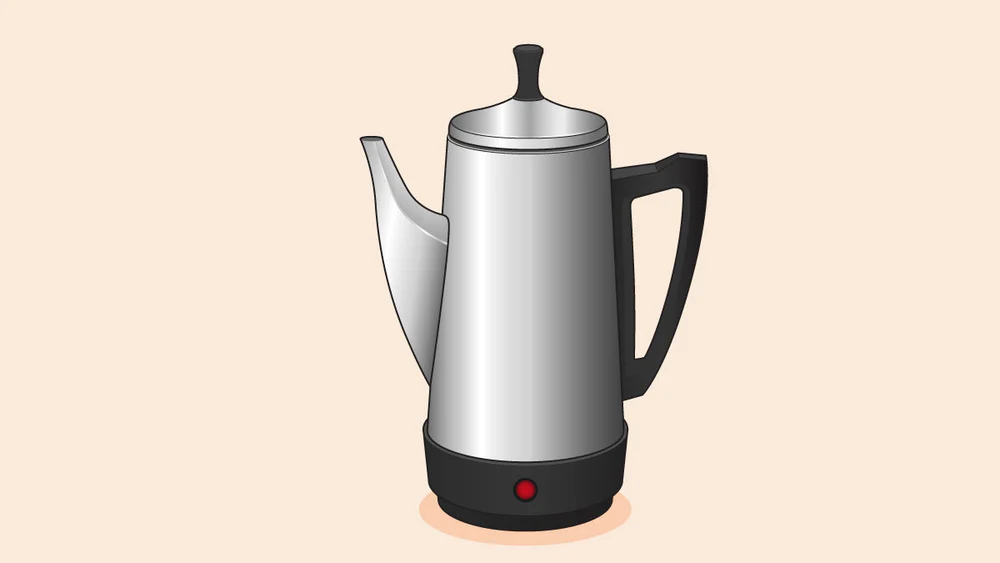
Percolators are available in two main styles: stovetop percolators, which are heated on a burner, and electric percolators, which have a built-in heating element.
Both operate on the same fundamental principle.
How Does a Coffee Percolator Work? A Step-by-Step Guide
Here is a step-by-step guide on how to use a coffee percolator:
Step 1: Grind and Measure Your Coffee
Start by grinding your coffee beans to a coarse consistency. Percolators work best with a coarser grind because the water passes through the grounds multiple times; a finer grind can lead to over-extraction and a bitter brew.
A burr grinder is the preferred tool for achieving a consistent coarse grind.
As a general rule, use approximately 1 tablespoon (about 7–8g) of ground coffee per cup (250ml) of water.
If you prefer a stronger brew, increase the ratio slightly, but avoid going too fine on the grind to compensate — this is a common mistake that leads to a muddy, over-extracted cup.
Read: How Many Scoops of Coffee Per Cup?
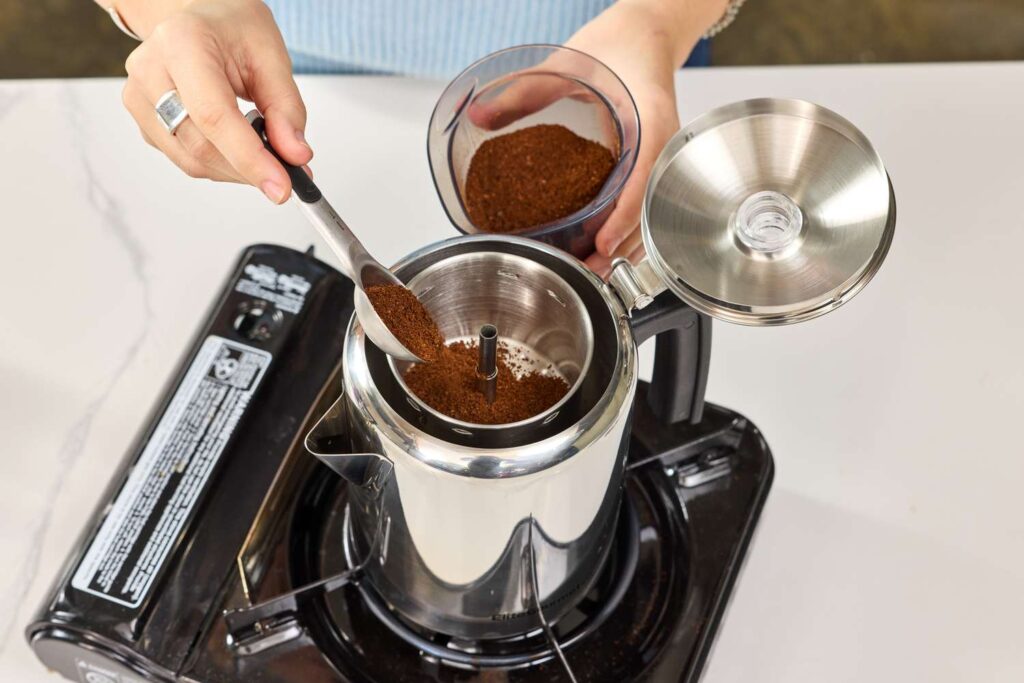
Step 2: Assemble the Percolator
Fill the lower chamber with cold, filtered water up to the desired level. Place the vertical tube into the chamber, attach the brew basket on top, and add your measured coffee grounds.
Avoid overfilling the basket, as this can block proper water flow. Some brewers choose to use a paper percolator filter inside the basket to reduce sediment in the final cup — though this is optional.
Step 3: Apply Heat
Place the assembled percolator on a stovetop burner or turn on your electric percolator. As the water in the lower chamber heats up, it begins to boil.
The steam pressure forces hot water up through the vertical tube, where it sprays out over the coffee grounds in the basket.
Gravity then pulls the now-coffee-infused water back down into the lower chamber.
Step 4: Monitor the Brew
This cycle of heating, rising, and dripping repeats continuously throughout the brewing process.
Many percolators have a transparent knob on the lid — called a percolator knob or coffee sight glass — which lets you observe the color of the brew as it darkens. This is your visual cue to gauge brewing strength.
Keep the heat at medium-low. Excessively high heat causes the water to boil too rapidly, which can scorch the grounds and produce a burnt, bitter flavor. Aim for a gentle, steady percolation.
Related: 6 Best Small Coffee Percolators for Home and Work
Step 5: Remove from Heat
Percolate for approximately 7 to 10 minutes, depending on your preferred strength. When the sputtering sound slows and becomes less frequent, the brew is nearing completion.
Remove the percolator from the heat promptly to avoid over-extraction, which causes bitterness. Allow it to rest for a minute before pouring.
Percolator vs. French Press: A Side-by-Side Comparison
Two of the most popular non-drip brewing methods are the percolator and the French press. Here is how they compare:
Percolator

The percolator is a workhorse. It brews large quantities (typically 8–12 cups) quickly and is ideal for gatherings.
A percolator (pictured above ⬆) does not require disposable filters (unless you choose to use them), is rugged and durable, and is available in camp-friendly stovetop versions.
However, because water cycles through the grounds repeatedly, it can over-extract if left too long, resulting in a stronger, more intense cup that some find harsh.
Pros:
- Brews large batches (8–12 cups)
- No paper filters required
- Affordable and low-maintenance
- Works on stovetop, campfire, or electric
Cons:
- Can over-extract if unmonitored
- Produces sediment without a filter
- Less flavor nuance than immersion or pour-over methods
French Press
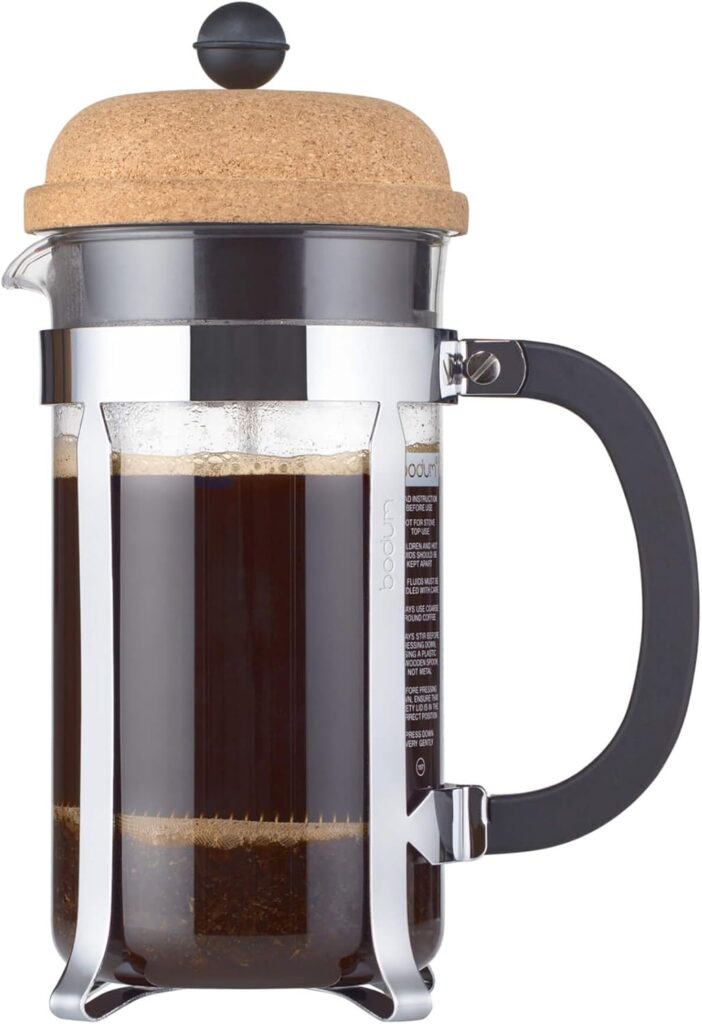
A French press (pictured above ⬆) uses full immersion brewing: coarsely ground coffee steeps directly in hot water for 3–4 minutes before a metal mesh plunger is pressed down to separate the grounds.
This method produces a rich, full-bodied cup with excellent flavor clarity. It brews smaller quantities (2–4 cups typically) and requires more attention to water temperature (ideally 93°C / 200°F) and steep time.
Pros:
- Rich, flavorful, full-bodied coffee
- Consistent results when timed correctly
- Easy to clean
- Affordable
Cons:
- Brews only 2–4 cups at a time
- Requires a separate kettle
- Some sediment in the cup
Which Should You Choose?
Neither of these brewing methods is objectively superior — the right choice depends on your priorities.
If you are brewing for a crowd, value simplicity, or enjoy a bold, robust cup, the percolator is a reliable companion.
If you prioritize flavor complexity and brew for one or two people, the French press will serve you better.
At CoffeNZO, we believe great coffee starts with great beans. Regardless of your brewing method, using freshly roasted, high-quality whole beans will always make a noticeable difference in your cup.
Related: 20 Coffee Brewing Methods Explained
Pro Tips for Better Percolator Coffee
- Use filtered water: Hard water or heavily chlorinated tap water can negatively impact the flavor. Filtered water is always the better choice.
- Go coarse on the grind: A medium-coarse to coarse grind reduces the risk of over-extraction and prevents fine grounds from passing through the basket.
- Start with cold water: Cold water heats more evenly and gives you better control over the brewing process.
- Don’t walk away: Percolators need monitoring. Leaving them on the heat too long is the most common cause of bitter percolated coffee.
- Clean your percolator regularly: Coffee oils accumulate over time and can turn rancid, tainting the flavor of your brew. Rinse thoroughly after each use and deep-clean weekly.
Compare: How to Make the Best Coffee in a Percolator
Frequently Asked Questions
Does a percolator make better coffee than a drip machine?
It depends on your taste. Percolated coffee tends to be bolder and stronger than drip-brewed coffee. Drip machines are more consistent and easier to use, while percolators offer a richer, more intense flavor when used correctly.
How long should coffee percolate?
Typically 7 to 10 minutes over medium-low heat. Shorter brews yield a lighter cup; longer brews risk bitterness. Start at 7 minutes and adjust from there to find your sweet spot.
How do I know when a percolator is done?
Listen for the percolating sound to slow to a near-stop. You can also watch the color through the sight glass on the lid — a deep amber indicates a fully brewed cup.
Do I need a coffee filter for a percolator?
Not necessarily. Percolators are designed to work without paper filters. However, using a paper or reusable percolator filter will reduce sediment in your cup and produce a cleaner-tasting brew.
What is the best coffee to use in a percolator?
A medium or medium-dark roast whole bean coffee, ground coarsely, works best. Lighter roasts can taste thin when percolated, while very dark roasts can quickly turn bitter.
Why does my percolator coffee taste burnt?
This usually happens when the heat is too high or the coffee percolates for too long. Use medium-low heat and remove from the heat source as soon as percolation slows.
Conclusion
The coffee percolator is one of the oldest and most enduring brewing methods in history — and for good reason. It is simple, scalable, and capable of producing a deeply satisfying cup when used with care. Now that you understand how it works, the key is in the details: a coarse grind, filtered water, moderate heat, and your full attention for 7 to 10 minutes.
Whether you are brewing for yourself on a quiet morning or serving a crowd at a gathering, the percolator delivers.
Related posts:
Specialty Coffee Scarcity - the Coming ‘Rarity Crisis’
Sunday April 19, 2026Macchiato vs Cortado: Which Bold Little Espresso Drink Actually Wins?
Tuesday March 17, 2026Cortado vs Cappuccino vs Latte: Which Espresso Drink is Right for You?
Sunday March 22, 2026Coconut Oil in Coffee: Benefits & How to Make It
Monday January 26, 2026How Much Coffee Grounds Per Cup of Water?
Monday May 18, 202625 Best Coffee Roasters in America
Thursday February 19, 2026Coffee to Water Ratio: The Secret to Brewing a Perfect Cup
Sunday May 17, 2026How to Remove Old Coffee Stains from Carpet: A Step-by-Step Guide That Actually Works
Wednesday April 29, 2026Does Coffee Liqueur Have Caffeine?
Monday May 4, 2026
Hi,
I’m Wycléf NY, a certified barista with 6 years of experience (as of December 2025).
I started this website to share my coffee preparation insights with aspiring coffee enthusiasts and interact with fellow baristas.
Let’s catch up over a cup of iced Coffénzo coffee or shoot me a quick short message text (sms) at ny@coffenzo.com